 (2048 × 2048 px) (686 × 676 px) (1).png")
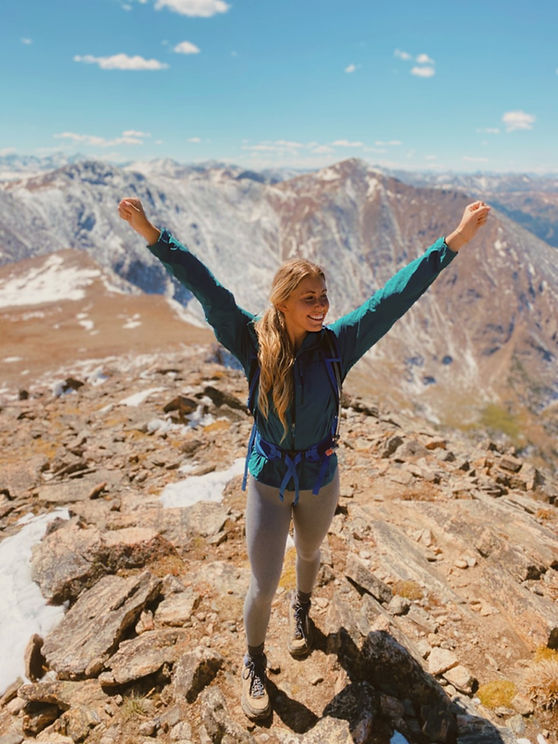
Wondering how to hike a 14er? Truth be told, I had never even heard of a 14er until I moved to Colorado. We don’t exactly have those in Indiana after all. So for anyone wondering what the heck a 14er is, let’s back up. A 14er is a 14,000 foot peak. The ultimate accomplishment for an aspiring hiker. That sort of altitude and ascent makes for a good challenge and even better views from the top. There are 58 peaks in Colorado that reach 14,000 feet, and many Colorado folk love to challenge themselves to summit at least one, if not more. Even visitors want to try their luck at some of the classic 14ers. But here’s the deal: the average person shouldn’t just “wing it” when it comes to a big hike up a 14,000 foot peak. This can result in not successfully summiting, feeling like complete garbage while hiking, or putting yourself in a less than safe situation. None of those outcomes are ideal. The altitude, the steep inclines, the long durations – they are not to be taken lightly. Imagine this instead: You do the work in advance, show up ready, and then absolutely conquer the hike. My goal today is to help you prepare physically for a 14er so that you can arrive at the trailhead confident that you did your due diligence. So let’s get into the 4 essential steps to train for a 14er!
- Begin a training program 2-3 months in advance
Like with anything worthwhile, fitness adaptations take time. You really can’t rush the process and expect optimal results. Be intentional, plan ahead, and start a program with your summit in mind. I recommend exercising at least 3-4x weekly, on a consistent basis for the 2-3 months leading up to your summit. If at all possible, do some training at higher altitudes. If you’re planning to visit for your big hike (and you live at sea level), this won’t be possible and that’s okay. In that case you will most likely just want to give yourself the full 3 months to prepare your body as much as possible. If you’re currently following a workout plan, you don’t have to drastically alter what you’re doing, but rather add in certain elements that I am about to go over to ensure you have a well-rounded program that will help you on the trails. If you’re looking for a fitness program specifically designed to get you in shape for hard hikes, I’m your girl. You can find all levels of my 3-month programs HERE.
2. Don’t skip strength work
A large part of being a successful hiker (especially tougher summits and longer backpacking trips) comes from strength. Too often, we only do cardio-type workouts: high intensity, nonstop circuits, or cardio machines. Here’s the reality: just because you use dumbbells doesn’t mean you’re really training for strength. For true, effective strength training, you should be completing 3-5 sets of 5-10 reps. Your muscles should feel WORKED by those last few reps. You will need to rest more so that you can recover and lift heavy again the next set. This means a circuit-type workout cannot be done as a strength workout. Be sure not to muddle down your strength workouts by rushing, going too light, or never progressing weights. Remember that “heavy” is relative to what you’ve lifted in the past, and how much you can currently lift. It is OKAY to be a beginner where 10 lbs in each hand feels heavy. You just don’t want to stay there. Every 2-3 weeks, see if you can progress your weights, especially on lower body lifts (which tend to be a little easier to gain strength). I recommend completing at least 2 strength workouts weekly that cover all your major muscle groups. Just because you don’t feel like you’re using your core or upper body as much during hiking doesn’t mean they’re not at work! Below are some example movements that can be done just with dumbbells.
- Step ups – can be done bodyweight or with dumbbells (more advanced)
Place one foot on a steady surface. Push through the top heel as you lift your other foot up. Repeat on that leg for desired rep count, then switch sides.
- Deadlift – Dumbbell in each hand
Let dumbbells just hang down in front of your thighs. Push hips back, hinge at the waist and lower weights down to about shin-height. Be sure to keep your back flat at the bottom, squeeze your core, and only slightly bend both knees. There should be a straight line from your tail bone to your head.
- Lateral Lunge with high row – Dumbbells in each hand
Let dumbbells hang down as you step into a lunge on one side. The lunging leg should bend to 90 degrees as you push your butt back (think single-sided squat) while the other leg remains straight. The dumbbells will come down to about shin-height. As you stand, push off of the lunging leg, bring the feet together, and pull both dumbbells up into a high row. You want your elbows to be the highest points and your knuckles to face forward. Repeat on that leg for desired rep count, then switch sides.
- Chest fly – Dumbbells in each hand
Lying flat on your back, bring both dumbbells up over your chest with your palms facing each other. As you open your arms, keep them as straight as possible while bringing your hands close to the floor. Squeeze the dumbbells together again bringing the palms together.
- Curtsey Lunge – Dumbbells in each hand
Bringing both dumbbells up to the shoulders, bring one leg back and slightly to the side bending both knees to 90 degrees. Try to get the stepping leg all the way to the ground with a nice, deep bend. Keep your hips, shoulders, and toes all pointed forward to achieve full benefits of curtsey lunge. Repeat on that leg for desired rep count, then switch sides.
- Arnold press – Dumbbells in each hand
Start with dumbbells up over the shoulder, elbows high with your palms facing you. From there, twist and raise dumbbells up so that your palms end up facing away from you and the dumbbells are over head.
- Pistol Squats – No dumbbells required
Using a sturdy surface for support with at least one hand, push hips back and lower down into a single leg squat. The squatting leg should end up at 90 degrees with the heel still fully planted while the other leg goes out straight. As you progress, work on getting the booty lower. Repeat on that leg for desired rep count, then switch sides.
- Reverse lunges – Can be done with one dumbbell at the chest, or two dumbbells at the shoulders
Plant one foot fully on the ground while the other leg takes a big step back. Bend both knees to 90 degrees as you bring the lunging leg down to tap your knee almost to the ground. Keep your chest tall and push through the front heel as you stand up.
- Weighted V-up – 1 dumbbell needed
Lifting your heels and keeping your legs straight, reach the dumbbell back behind your head while still keeping shoulders slightly off of the ground. In one swift movement, reach dumbbell up, lifting your back off the ground entirely and lifting your legs at the same time. As you lower back down, try to keep your shoulders and heels hovering off the ground.
- 1.5 Deadlift – Dumbbell in each hand
Plant one foot fully on the ground while your other foot acts as a kickstand (only tiptoe on the ground). As you put most of your bodyweight into the grounded foot, push hips back, hinge at the waist and lower weights down to about shin-height. Be sure to keep your back flat at the bottom, squeeze your core, and only slightly bend both knees. Repeat on that leg for desired rep count, then switch sides.
- Split stance row – 1 dumbbell needed
Holding a dumbbell in the arm opposite of the forward leg, assume a split stance, keeping the back leg straight and bending the front leg to 90 degrees. Let your chest come forward with a flat back, and extend the arm with the dumbbell down toward your foot. From there, pull the dumbbell to your hip, bending your elbow. Keep the rest of your body still. Repeat on that side for desired rep count, then switch sides.
- Twisting DB V-up – 1 dumbbell needed
Hold dumbbell at your chest as you set up on your booty with your knees tucked to your chest, as you lean back, you’ll twist the dumbbell to one side and straighten the legs (keep the heels hovering). In one swift motion, reset again with the dumbbell to the chest and knees tucked in. Then repeat side to side for desired reps.
- Squats – dumbbells in each hand
Raising the dumbbells up to rest on the shoulders, start by pushing the hips back like you’re sitting in a chair. Then begin to bend the knees to 90 degrees, keeping your weight back in your heels. The chest will stay tall.
- Back Elevated Glute Thrusts – 1 dumbbell needed
Lean back up against a sturdy surface (bench or couch) with your arms out to the side like you’re sitting in a hot tub. Place the dumbbell on your hip bones, push heels into the floor (knees bent), and lift the hips up as high as possible squeezing through the glutes. Your neck and head will relax back onto the surface supporting you. Lower back down and repeat for desired rep count.
3. Prep for the duration
The reality is, it’s really tough to prepare for body for a marathon without running long distances, right? The same principle applies when it comes to long duration hikes. You must put in the time and miles in order for your body to perform well on a long hike! So while you may not be able to go out and hike 10 miles every week, there are a lot of activities you can do anywhere that will build your aerobic base. You see, hiking is an aerobic activity. This means, a steady-state, low to moderate intensity activity that is repetitive. Other aerobic activities include: jogging, biking, elliptical, stair-climber, swimming, cross-country skiing, snowshoeing, What DOES NOT help with building an aerobic base: circuit training, weight training, super fast runs, sprints. A mistake A LOT of people make (including me for many years), is thinking that just because you do conditioning-type workouts (sprinting, circuits, etc), that you’ll be prepped for long, strenuous hikes. It’s imperative to train your aerobic system properly for long hikes. Here are some training methods I recommend for this:
- Incline walking on a treadmill for 45 minutes or more once a week
- Incorporating one long bike ride or run every week (4+ miles)
- Going for long hikes each week if you have access to do so
- Doing the elliptical or stair-climber at the gym for 45 minutes or more once a week
While doing these activities, focus on low to moderate intensity. Think about trying to breath out of your nose only (mouth closed) or being able to talk to someone the whole time without being too winded. Your pace should be slow enough to do this as you build (and it will take time).
4. Train for muscular endurance
Muscular endurance is the ability to repeat a muscularly taxing movement for a long duration. Most workout classes focus heavily on muscular endurance: think high rep bodyweight or light weight training. If you’re completing more than 12 reps of any exercise, you’re training for muscular endurance. Where this comes in handy for hiking is when you have a steep ascent, that keeps tension on your quads, glutes and calves for a sustained amount of time. You want your muscles to be able to push through that burn and keep going. Dedicating at least one day per week to muscular endurance training is recommended. This can look like:
- All of the strength exercises shown above, but done for high rep, lower weight
- Bodyweight circuits for high rep
- Most workout classes when you’re exercising for time rather than sticking with the 6-12 rep range
To really prepare well for a 14er, begin a program that combines muscular strength, aerobic cardio, and muscular endurance so you have a well-rounded program. Not only will this thoroughly prepare you for the ascent, but you’ll also set yourself up for success when it comes to ideal body composition and just being fit in general! For the perfect hiking fitness plan for any fitness level, be sure to check out my Fit for Hiking guides HERE. They combine all components discussed today and will make sure you feel AMAZING on the trails this summer!
Happy Trails,
Bradee XO

Be The First To Comment